Question Editor Tabs
When you initially open the question editor, tabs for Home, Format, and Find appear. These tabs allow you to include specialized question content, apply text formatting and styles, and a feature for the search and replacement of text. These tabs are available to every question template.
Using the Home Tab
To help you add content and specialized objects in your questions and feedback, the Question Editor is available from most editing areas on the Instructor Authoring page. This "What You See Is What You Get" (WYSIWYG) toolbar makes it easy to insert tables, graphs, formulas, and images uploaded from your local system. You can also define and insert input and pop-up text fields. These specialized options are introduced below. Also see Advanced Question Editor Tabs for details on tabs for setting preferences and creating answers.
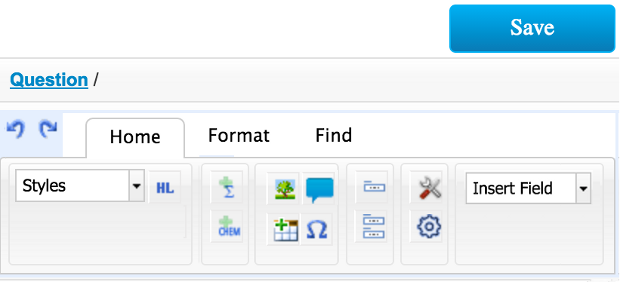
Note: The options available to you on the toolbar depend on which question type you are creating or editing.
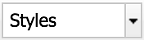 Styles Menu
Use this dropdown menu to assign one of the pre-formatted styles to the selected block of text or object.
 Style Highlight
Click this icon to highlight the selected text with a opaque green bar. Click Undo to remove the highlighting.
 Insert Math Formula
Click this icon to insert formulae using advanced mathematical or Chemistry notation. The equation can include variables and a full range of symbols. See Using the Math Formula Editor for more details.
 Insert Chemistry Formula
Click this icon to open a basic Chemistry Formula Editor in a pop-up window. You can use this editor to create chemical formulae with the appropriate formatting. See Using the Chemistry Formula Editor for more details.
 Insert Image
Click this icon to open the Insert Image pane where you can upload and place images in your questions, hints, or rejoinders. You can upload images into CengageNOWv2 from either the Insert Image window or from the My Images tab. Files that are not in a usable format cannot be selected for upload. See Inserting an Image for more details.
 Insert Table
Click this icon to insert and format complex tables of information. Tables are a helpful way to present a sample data set for use in a question. You can use the Insert Table pane to set preferences such as adding rows, columns, cell formatting, setting alignment, and shading. See Inserting a Table for more details.
 Insert Symbol
Click this icon to open the Insert Symbol pane where you can choose from a wide variety of custom characters to use in your question. Place a symbol in your question or feedback field by selecting it from the pane. See Inserting Symbols for more details.
 Answer
In Essay questions, clicking this icon opens the Answers editing tab in a new window. You can enter notes in a provided field to assist you when manually grading. These notes are available from the answer key.
Click the Answer Editor link to open a new editing window that includes a formatting toobar that supplies standard text editing in addition to tables, special characters, and horizontal lines. Click Save to keep your changes before exiting. See Essay for more details.
Edit True False
In True False questions clicking this icon opens both the Answers and Settings tabs where you can author feedback and edit settings specific to True False questions.
You can also double click on the answer field to open both the Answers and Settings tabs. See True False for more details.
 Edit Choices
In Multiple Choice and Multiple Select questions, clicking this icon opens the Settings and Answers tabs where you can choose to freeze answer choices, author the correct responses, and create feedback for each choice in your question. See Multiple Choice/Multiple Select for more details.
 Edit settings
In Essay questions, you can click this icon to open the Edit settings pane. This pane supplies options for choosing the Essay Type, entering the Post Submission Feedback, and entering the Initial Text. See Essay for more details.
 Edit Properties
Click this icon to open the Edit properties pane where you can set several preferences that affect the behavior of your question. See Edit Properties Tab for specific details.
 Insert Popup
Highlight a section of text and click this icon to create a popup message that appears when the selected text is clicked. You can set the popup window's width, height, and style (hotspot or popup) properties, then enter the text for your message.
Click Insert when you are done, then click Preview to see how your message appears in an assignment. See Inserting Popups for more details.
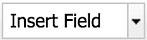 Insert Answer Field
In Fill in the Blank questions, you can use this dropdown menu to insert an Answer Field into the body of your question. Simply place your cursor on the appropriate area in the Question field and make a selection for either a chem, text, number, or select answer type.
The Answers and Settings tabs automatically open once you've selected a field. From these tabs you can author the responses, create rejoinders, and set a grading tolerance. Double clicking in an answer field opens the Answers and Settings tabs again. See Fill in the Blank for more details.
The Home tab's Question field is generally your starting point. You use this field to enter or edit the statement for the body of your question.
Type directly into the editing field to enter the basis of your question. You can then use the CengageNOWv2 Question Editor to easily include images, equations, graphs, tables, input (FITB) boxes, and format text.
The Home tab's Feedback field is used to enter or edit any feedback messages you may want to provide for the question as a whole. This message is shown at the bottom of the page only after the question is answered and submitted.
You can also use the CengageNOWv2 Question Editor to include images, equations, graphs, tables, or format the text in your message.
Note: If the Feedback is not defined, a simple rejoinder of either "Correct," "Incorrect," or "Partially Correct" is displayed, depending on the score. (In questions that provide it, partial credit must be enabled to use "Partially Correct.")
The Home tab's Solution field is used to enter or edit a message with details about the correct response. This information is saved as a comment that is visible only from within the Question Editor.
You can also use the CengageNOWv2 Question Editor to include images, equations, graphs, tables, or format the text in your comment.
In the Hints field, you can author a series of hints to appear in the question. Hints are different from feedback or rejoinders in that they appear in a sequence and are viewable before the question is answered. Students need to click the Hints button to have them displayed.
You can create multiple hints by clicking the Add Hint link. The hints appear in ascending numbered order and are labeled so that the student can determine if more are available ("Hint #1 of 3," for example). Hints can also contain images, graphs, tables, equations, and formulas. Use the Question Editor to insert these additional objects.
Using the Format Tab
The Format tab supplies you with a palette of basic text editing options. You simply select the text to be formatted and click the appropriate icon.
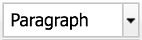 Paragraph
Use this dropdown menu to choose and apply predefined formatting styles to the selected text.
 Font Size
Use this dropdown menu to choose and apply a new font size to the selected text.
 Font Family
Use this dropdown menu to change the font of the selected text.
 Font Color
Use this dropdown menu to choose and apply a new font color to the selected text.
 Highlight Color
Use this dropdown menu to choose a color as a highlight the selected text.
 Bold
Bold
Click this icon to apply bold formatting to the selected text.
 Italic
Click this icon to apply an italic or sloping style format to the selected text.
 Underline
Click this icon to place a line under the selected text.
 Strikethrough
Click this icon to place a strikethrough line through the selected text.
 Subscript
Click this icon to place the selected text in a subscript position, slightly below the proceeding character.
 Superscript
Click this icon to place the selected text in a superscript position, slightly above the preceding character.
 Alignment
Click an icon to change the alignment of the selected text to left justified, centered, right justified, or full alignment.
 Indent
Click these icons to adjust the positioning of the selected text relative to the left margin.
 List Style
Click this icon to place the selected text in either an numbered (ordered) or bulleted (unordered) list.
 Blockquote
Click this icon to format the selected text as a quote taken from another source.
Using the Find Tab
The Find tab supplies tools for finding and replacing the designated text.
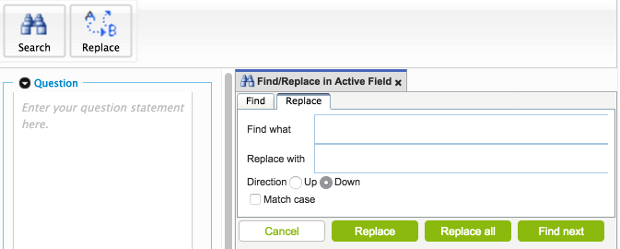
 Search
Clicking the Search icon allows you to search for a specific word or phrase in the active field.
- 1. Click the Search icon to bring the Find tab into focus.
- 2. Enter your search term in the Find what text box.
- 3. Choose either Up or Down for Direction to define the search order.
- 4. (Optional) Select Match case to make your search case sensitive.
- 5. Click Find next until your search is complete.
- 6. Click Cancel to exit the search window.
 Replace
Clicking the Replace icon allows you to search for a specific word or phrase in the active field and replace it.
- 1. Click the Replace icon to bring the Replace tab into focus.
- 2. Enter the term you are searching for in the Find what text box.
- 3. Enter the replacement term in the Replace with text box.
- 4. Choose either Up or Down for Direction to define the search order.
- 5. (Optional) Select Match case to make your search case sensitive.
- 6. Click Find next and then click Replace to make substitutions individually, after you've had a chance to review them.
- 7. (Optional) Click Replace all to substitute all instances at once.
- 8. Click Cancel to exit the search.